
Basic DOSBox Tutorial
DOS games stopped working reliably when DOS was removed from Windows after Windows 95/98/Me. Windows XP could still natively play some DOS games, but the sound could be missing, the speed could be wrong, or the game might not work at all. Starting with Windows Vista, only text-mode games can be played in 32-bit versions of Windows, and 16-bit software doesn't work at all in 64-bit versions. Fortunately, almost all DOS games play perfectly in an emulator called DOSBox, which is available for Windows, Linux, OS/2, BeOS, and Mac OS X, and has been unofficially ported to almost every other modern platform.
For people who are used to the DOS operating system, or command line operating systems in general, DOSBox is pretty straightforward. If you're from the age of point-and-click GUIs, you may need a bit of extra help. Either way, DOSBox is easy to use, once you understand it. If, after reading this tutorial, you don't agree that DOSBox is incredibly easy to use, I'll give you your money back! Oh, right. The other great thing about DOSBox is that it's free.
Anyway, you can get DOSBox from the Utilities page, or from DOSBox's website. Download the version for your operating system and install it. If you use Windows, DOSBox will be added to your Start Menu.
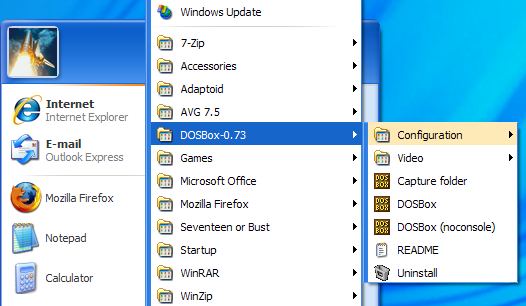
Select the "noconsole" option; the standard link just opens a second window with information that you'll never need to know.

Drive mounting
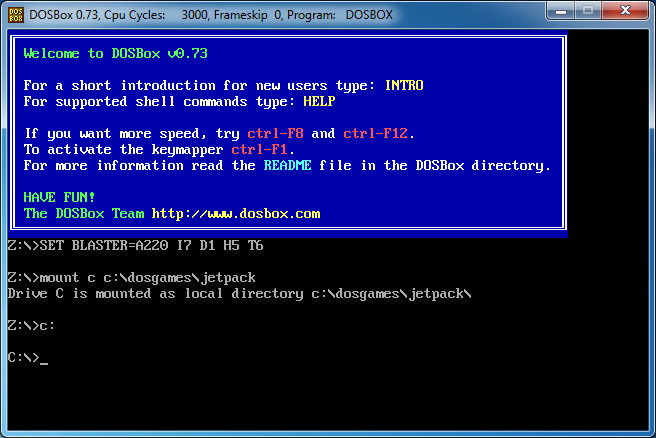
This is the part where people who aren't familiar with DOS may need some help. First, you need to know where your game is. Let's say that you have a folder on your C: drive called DOSGAMES, and a folder inside it called JETPACK. (Always replace code examples with the actual drive and folder names where your game is located.) DOSBox is going to pretend that some folder on your hard drive is really a hard drive (a virtual drive), which you accomplish by mounting the virtual drive. You can assign any letter you want, except for Z:, which is being used by DOSBox. You can even use "C:" as the name for your virtual drive, even if that's the drive where your game is. You must mount a virtual drive in order to run a game in DOSBox. From the command prompt (Z:/>), type:
mount c c:\dosgames\jetpack
Note that folder names aren't case sensitive in Windows, but may be in other operating systems. Now the folder that Jetpack is in is mounted as the C: drive. You can switch to the mounted drive by typing the name of the drive.
If you want to play another game, you can mount it to a second drive letter, or unmount the first drive with the "-u" parameter of the mount command, such as:
mount -u c
Now a new folder can be mounted as the C: drive.
Once you've switched to the virtual drive you've created, you need to run the game by typing in the name of the executable file. If you already know the filename, you can type it in now. If you don't, you can use the old DOS directory command, "dir".
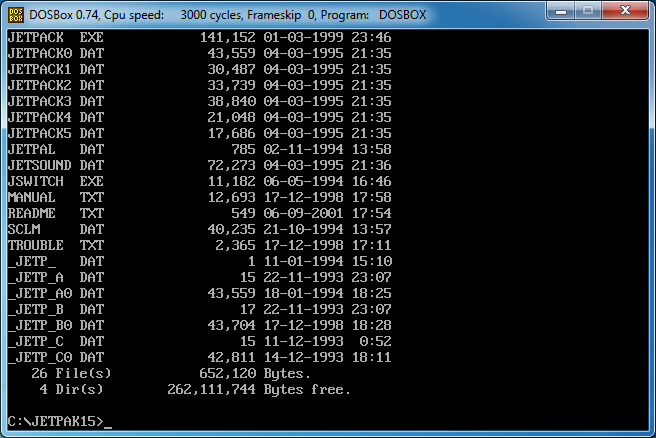
Ack! Some games will have too many files. All programs have either a .exe or .com extension. Some games run a batch file (.bat) first, which might select some of the settings before it starts the game. These are the only three extensions you care about.
You can narrow your search using "wildcards". To DOS, a question mark represents any character, so if you want to find a list of files that start with "game" and end with a letter or number, you could do a search for "game?.exe". An asterisk represents any string of any length, so if you want to search for all of the files that end with .exe, search for "*.exe".
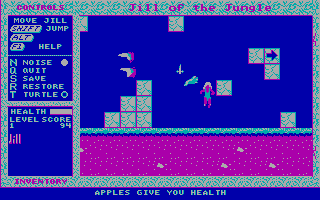
In this case there are two .exe files, but often there will only be one. JETPACK.EXE is probably the right one, so we can type in "jetpack". Because only .exe, .com and .bat files are executable, you don't have to type the .exe extension into the command line. DOS, and DOSBox, will assume that you want to run the .exe file with that name.

And now you're playing Jetpack!

If you're satisfied with the way the game is playing, you can switch to full screen mode by pressing Alt+Enter, and now you're playing just like on a real DOS computer! DOSBox will play most games perfectly using the default settings. In the beginning of the PC, there was only one type of PC, which used an Intel 8088 processor running at 4.77 MHz. Because there was only type of PC, the very first DOS games were designed to run at 4.77 MHz. If you try to run a game designed for the original IBM PC or XT on a faster computer, it might run way too fast. If a game is running too quickly, you can slow down DOSBox's virtual CPU by pressing Ctrl+F11.
Some games that were designed to run on Pentium processors may run too slowly at the default settings. If a game is running too slowly, you can speed up DOSBox's virtual CPU by pressing Ctrl+F12. This changes the "cycle count", which you can see at the top of the interface window. In this case, I've doubled the default cycle count to 6000. You may need to go well into five digits for some games.
If you're playing a game that supports SoundBlaster audio, but sound effects or music are missing, you may need to change the sound settings. Remember that weird line of numbers when you started DOSBox?
What the heck is that about? Well, in the days of DOS, "set blaster" was used to configure the sound card. These settings represent the "A"ddress, "I"nterrupt (IRQ), "D"MA channel, "H"igh DMA channel, and "T"ype. These settings are fairly standard, and many games that are advanced enough to support SoundBlaster hardware can auto-detect your sound settings. Here's an example of a setup screen that allows you to change the sound settings before running the game.
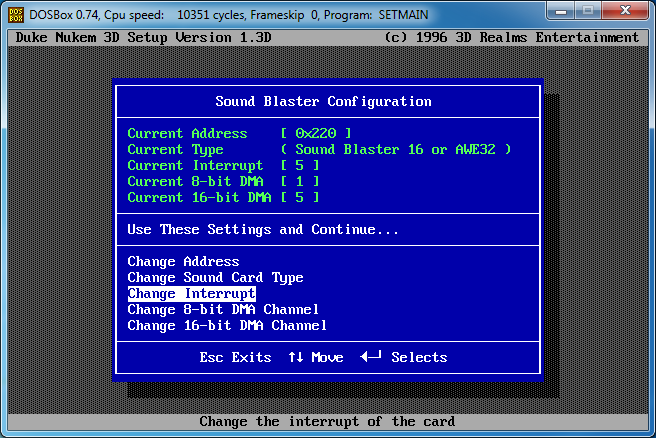
The Address is 220, which matches our "A220" setting. The 8-bit DMA Channel is 1, which matches "D1", and the 16-bit DMA Channel is 5, which matches "H5". The Interrupt is set to 5, but we're set up for "I7". This could prevent the sound from playing, or crash the game entirely. The Interrupt should be changed to 7. If you've forgotten, you can check the SoundBlaster settings from the command prompt by typing "set blaster".
Some games will only allow certain audio settings, so if you can't change the game to match your setting, you can change your settings to match what the game expects using the powerful "config" command. The "-set" parameter of the config command can be used to change a configuration setting, and the name of the setting we want to change is "sblaster". DOSBox's internal name for the "A" variable is "sbbase", "I" is "IRQ", "D" is "DMA", and "H" is "HDMA". Now we can change any of the SoundBlaster variables, one at a time, with a command like this:
config -set sblaster sbbase 220

config -set sblaster irq 7

config -set sblaster dma 1

config -set sblaster hdma 3
Setting the machine
Besides speed and sound, there's usually only one other thing you need to change to get a game to play properly: the "machine" setting. By default, DOSBox emulates a SVGA graphics card. This is a good choice because SVGA graphics cards were backwards compatible with VGA, EGA, CGA and MDA graphics modes. Most were not compatible with non-IBM graphics standards, such as Hercules and the Tandy color graphics card.
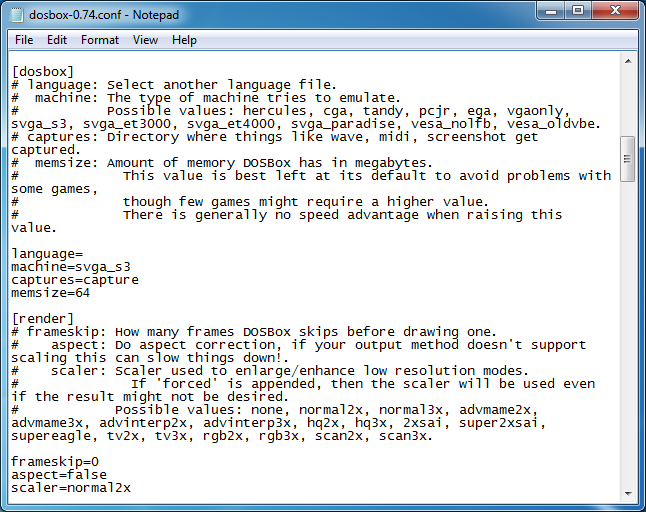
It's possible to tell DOSBox what type of machine to run as by starting DOSBox from the command line and adding "-machine=[name of machine]", but that's not a very convenient way to do it. The easiest solution is to edit a configuration filed called dosbox-0.74.conf. If you use Windows, follow the Start Menu to DOSBox-0.74 > Options > DOSBox 0.74 Options. You can prevent DOSBox from working properly if you modify or delete things in the configuration file, but you can click "Reset Options" from the Start Menu to put things back to normal.
Once you have dosbox-0.74.conf opened in a text editor, you can scroll down a short way, or do a search for "[dosbox]". That's where you'll find the machine variable. To make DOSBox emulate a Hercules graphics card, change the setting to "hercules". You can't change the machine once DOSBox starts, so you'll have to change this line back when you want to play VGA/SVGA games again.
CGA
| Palette 0 | |
|---|---|
| Low intensity | High intensity |
| default | default |
| 2 (green) | 10 (light green) |
| 4 (red) | 12 (light red) |
| 6 (brown) | 14 (yellow) |
| Palette 1 | |
|---|---|
| Low intensity | High intensity |
| default | default |
| 3 (cyan) | 11 (light cyan) |
| 5 (magenta) | 13 (light magenta) |
| 7 (light gray) | 15 (white) |
| Mode 05h | |
|---|---|
| Low intensity | High intensity |
| default | default |
| 3 (cyan) | 11 (light cyan) |
| 4 (red) | 12 (light red) |
| 7 (light gray) | 15 (white) |
While EGA, VGA and SVGA graphics cards supported CGA graphics modes, they often select the wrong palette when CGA games are played. Without getting too technical, CGA supported 16 colors in text mode, and 4 colors in graphics mode. While in graphics mode, the background color could be set to anything (black by default), while the other three colors were red, green and brown (Palette 0), or cyan, magenta and white (Palette 1). A "high intensity" bit could be set to make them brighter or lighter.
CGA cards had a DE-9 connector for color monitors and a composite connector for monochrome monitors, so both of the CGA text modes (80×25 and 40×25) and the 320×200×4c graphics mode had a corresponding "grayscale" mode. Composite monitors would display the CGA colors in shades of gray, but color monitors displayed them in color, so that there was no difference between the color and grayscale modes. In the grayscale version of the 320×200×4c graphics mode, Mode 05h, RGB monitors would display the four colors using Palette 1, but magenta was replaced with red. Some developers used Mode 05h as an unofficial third palette!
Pharaoh's Tomb and Arctic Adventure feature the same engine and the same hero, but Pharaoh's Tomb uses Palette 0 to display warm, desert colors, while Arctic Adventure uses Palette 1 to display cold, arctic colors.
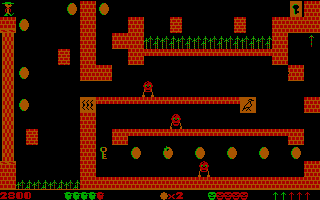 Pharaoh's Tomb in Palette 0 |
 Arctic Adventure in Palette 1 |
Older versions of DOSBox defaulted to Palette 1 while in the default SVGA video mode, causing Pharaoh's Tomb to take place at the North Pole! This seems to have been resolved in the latest version, but you may still find some games that default to Palette 1 when they were intended to be Palette 0. Non-CGA graphics cards didn't support the unofficial third palette in Mode 05h, and default to Palette 1. To be sure that you get the right colors in CGA games, it's safest to run DOSBox in CGA mode.


Mounting CD-ROMs and floppy drives
The final problem that you're likely to run into is when you're running a game from a CD-ROM, or a game on your hard drive that expects to be run from a CD-ROM drive. To mount a folder or drive as a CD-ROM drive, use the "-t" parameter of the mount command. The following are the commands to mount a CD-ROM drive called D: using a CD-ROM in your computer (replace "e:\" with the actual drive name), or a folder on your C: drive, respectively.
mount d e:\ -t cdrom

mount d c:\dosgames\cdgame -t cdrom
You can also mount a virtual floppy disk by using "floppy" with the -t parameter. This simple command parameter should be good enough most of the time. If your CD-ROM game still isn't working, advanced mounting options can be found in the DOSBox readme file.
Reporting the DOS version
The last problem that you stand a small chance of running into relates to the version of DOS reported by DOSBox. From DOS all the way to modern Windows, typing "ver" at the command line reports the operating system version that you're running. Typing "ver /r" will also list the revision in some versions. Some programs won't run if they don't like the version of DOS that you're running. DOSBox reports DOS 5 to any program that asks, which is a problem if they were designed for DOS 6 or higher, or require a specific version of DOS other than 5. You can change what version of DOS DOSBox reports with the "set" parameter of the ver command. The format is "ver set [major version] [optional sub-version]". For example, "ver set 6" reports DOS 6, and "ver set 6 22" reports DOS 6.22.
Fun extras
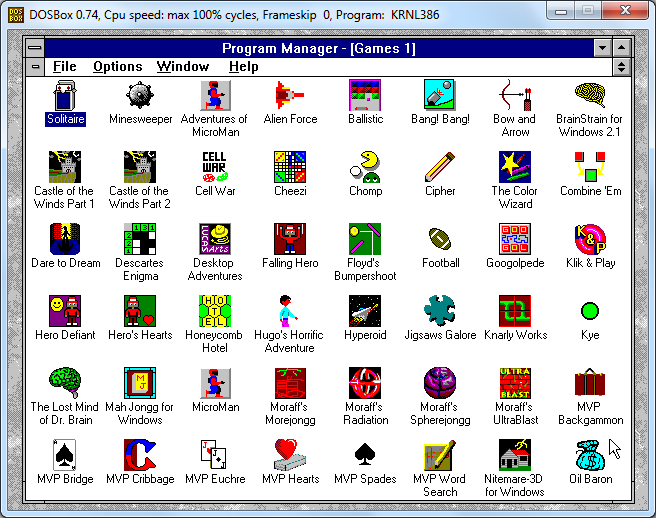
DOSBox is so accurate at emulating DOS that it can even run operating systems that run on top of DOS! If you have a copy of Windows 3.1, you can install it while running DOSBox and play Win16 games the way they were meant to be played. Windows looks and sounds exactly the way you remember it, and you can use all of your favorite features, from Minsesweeper to the old Windows Calendar program. The Windows calculator still has that bug that Microsoft was too embarrassed to reveal (try subtracting 3.1 from 3.11). Put DOSBox into full screen mode and it's just like running Windows on an old PC!
Whichever platform you run your software on, you can save screenshots (Ctrl-F5) and record movies (Ctrl-Alt-F5 to start and stop). When you want to have complete control over the way DOSBox runs, you can learn more about the configuration file. This allows you to change the default settings to give yourself precise control over every aspect of the system being emulated, such as how much RAM DOSBox should pretend to have. The configuration file is fairly self-explanatory, so I won't explain it here. The purpose of this tutorial is to allow most people to play most games, and this is all that you need to know to accomplish that. Mounting and switching between drives, and getting the speed, sound, and video correct are the most common obstacles to playing DOS games in DOSBox. Only an advanced user needs to know more than this. To learn more about the advanced features of DOSBox, and how to configure Windows 3.1 to have sound and be able to play games that require better than VGA graphics, move on to the Advanced DOSBox Tutorial.
Congratulations on completing the Basic tutorial!